
Hiro MCP
Learn how to use the Hiro MCP with Claude or Chat GPT to access your client data, get AI-assisted insights, and automate your reporting workflow end to end.
Data Use & Agency Responsibility
Before activating, please review what Hiro provides and what you are responsible for.
No model training
Hiro does not use your data to train or improve any AI model.
No PII processed
The MCP operates on non-PII data only, per our Data Processing Agreement.
AI responses are powered by Anthropic, Inc. Anthropic retains API data for up to 7 days for trust and safety purposes before automatic deletion — it is never used for model training. Hiro does not accept liability for Anthropic's independent data practices. Review Anthropic's privacy policy.
Your responsibility before activating
You have reviewed your client contracts and confirmed you have authority to use third-party AI tools to access their data.
You have verified that using AI-assisted tools is consistent with your clients' Klaviyo and Shopify platform terms.
Where required by law (GDPR, CCPA, etc.), you have obtained appropriate client consent or authorization.
You will not submit queries designed to retrieve or reconstruct personally identifiable information.
By activating the Hiro MCP, you confirm you have read and understood the above, have the authority to use this integration with your clients' data, and agree to the terms of the Data Processing Agreement.
Resources
How to connect Hiro to Claude
Step 1: Open Claude and go to Settings
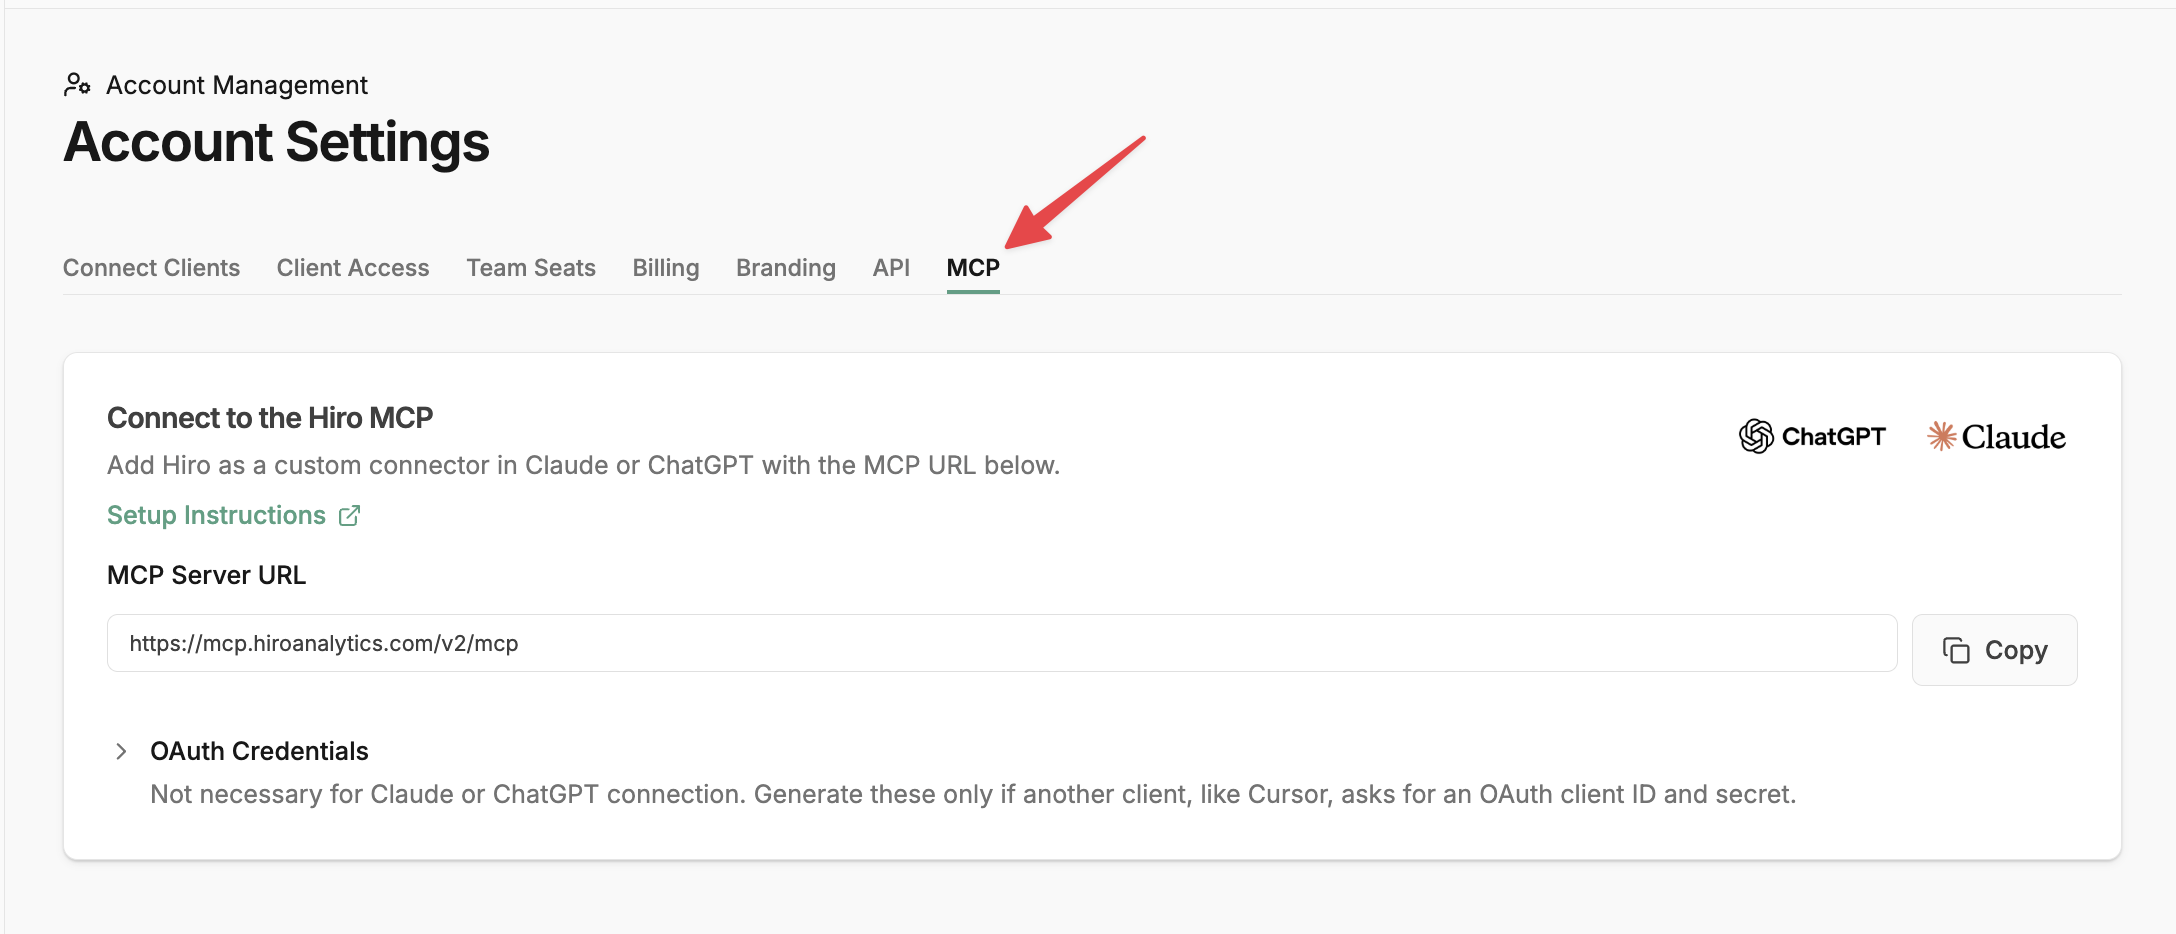
Have both your Hiro account MCP Server URL and your Claude workspace open in separate windows. You can find the link to the Hiro MCP on the Account Settings page.
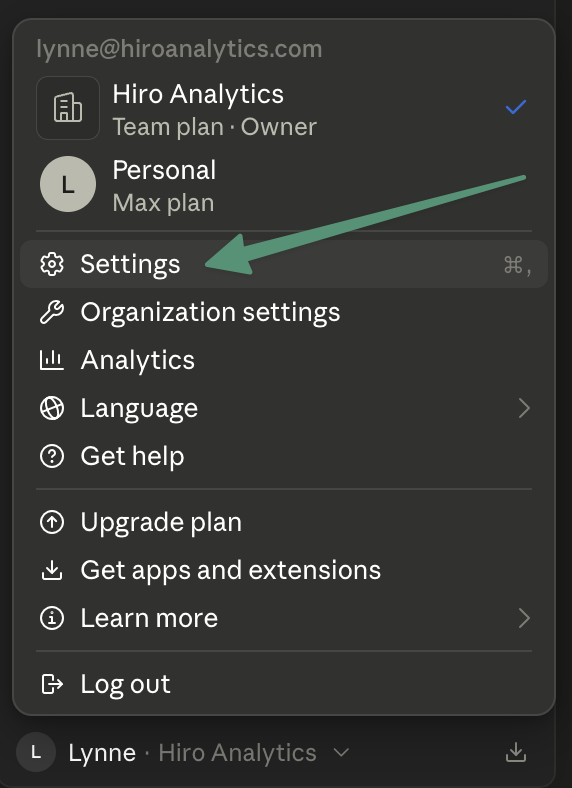
In Claude, click on your profile or the menu to open Settings.
Important: Setting up connectors for your team
Team and Enterprise plan owners must enable connectors at the organization level before anyone can use them. Enabling a connector makes it available to your team — but each member still needs to authenticate individually via their own Settings.
If you're an owner, here's how to enable Hiro for your workspace:
Go to Organization Settings → Connectors → Add Custom → Web
Name the connector Hiro
Paste the MCP server URL into the URL field
Leave the default selections the same and press save
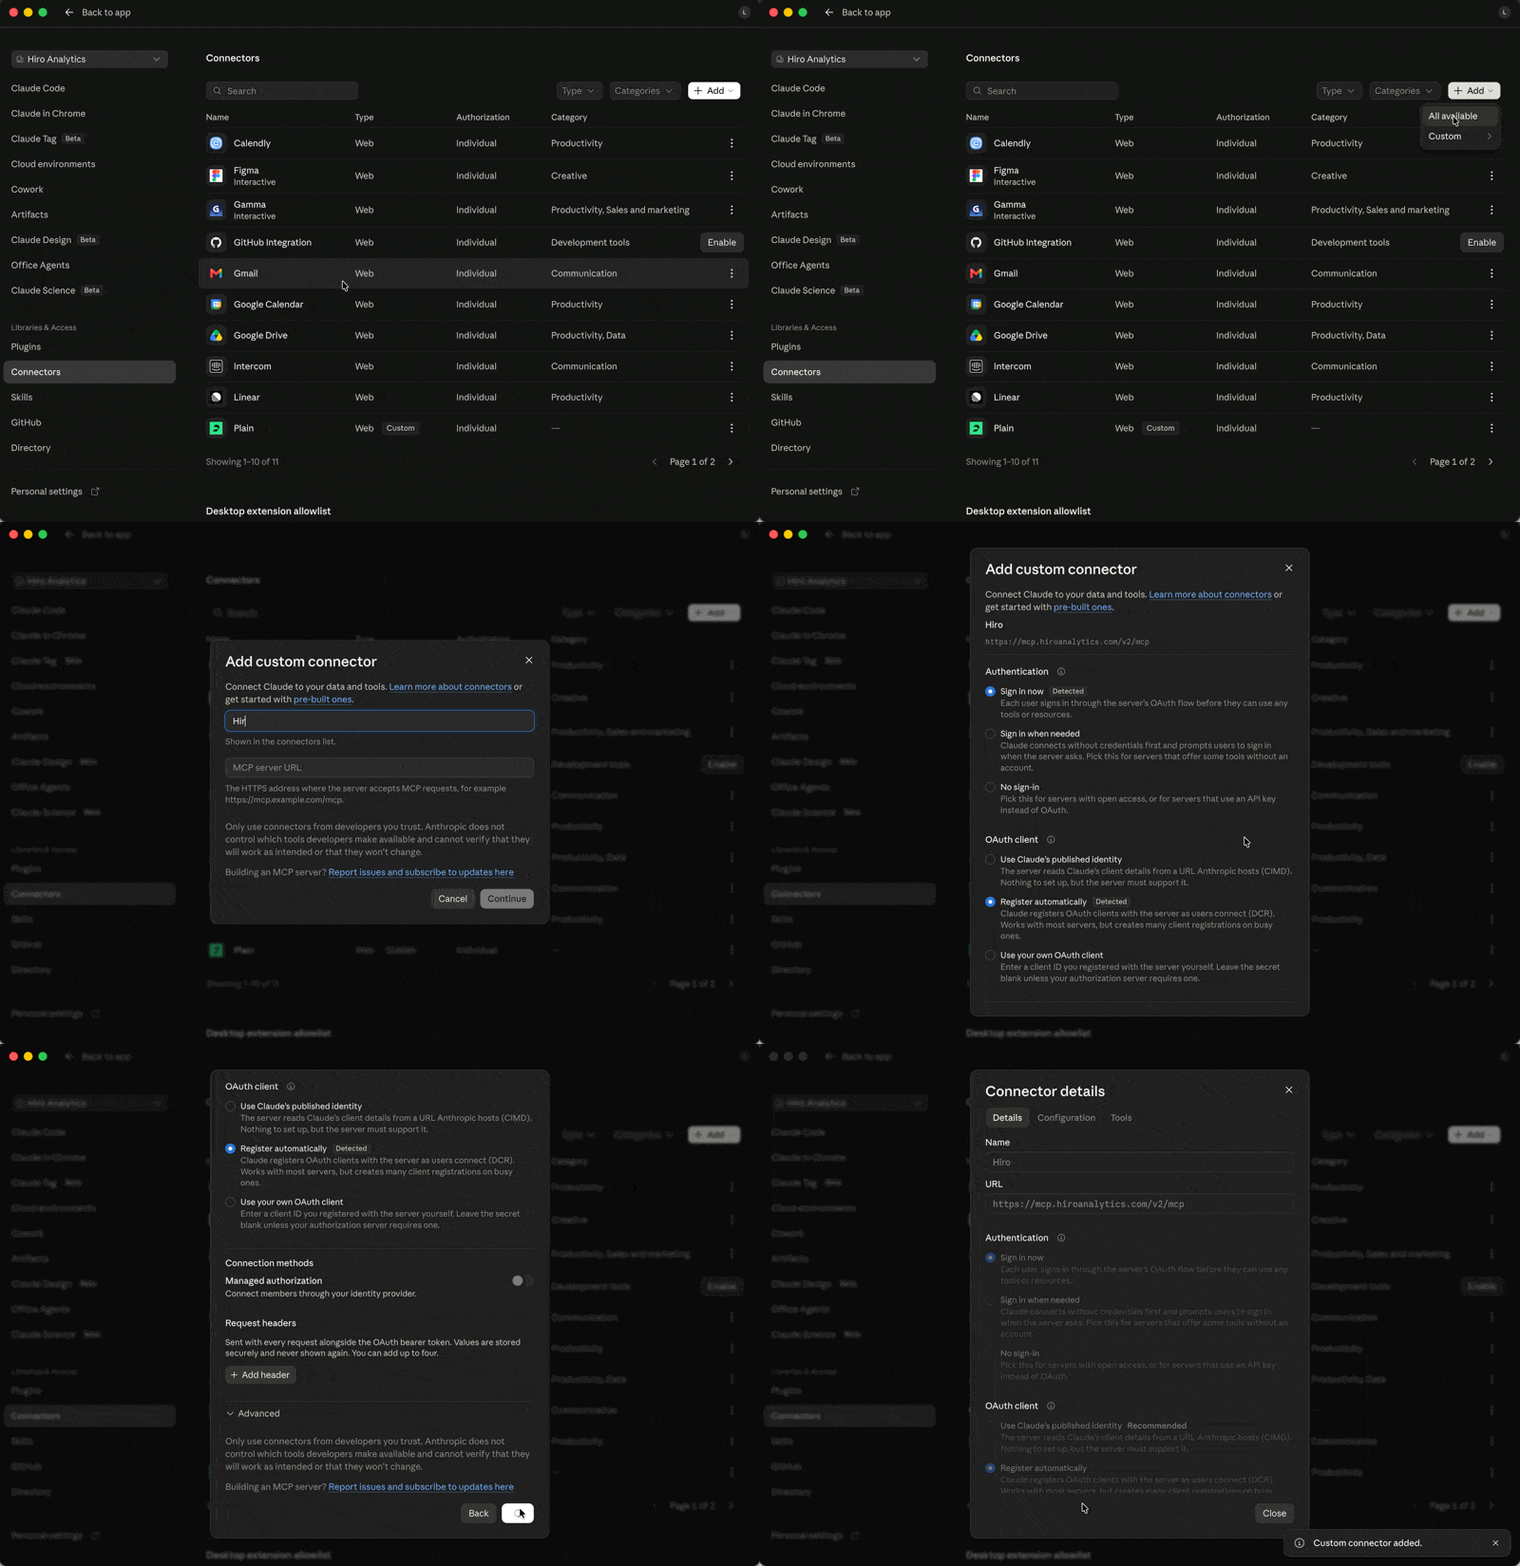
Once saved, Hiro will appear in your team's connector list. Each member can then authenticate with their own credentials by following the steps below.
Step 2: Navigate to Connectors
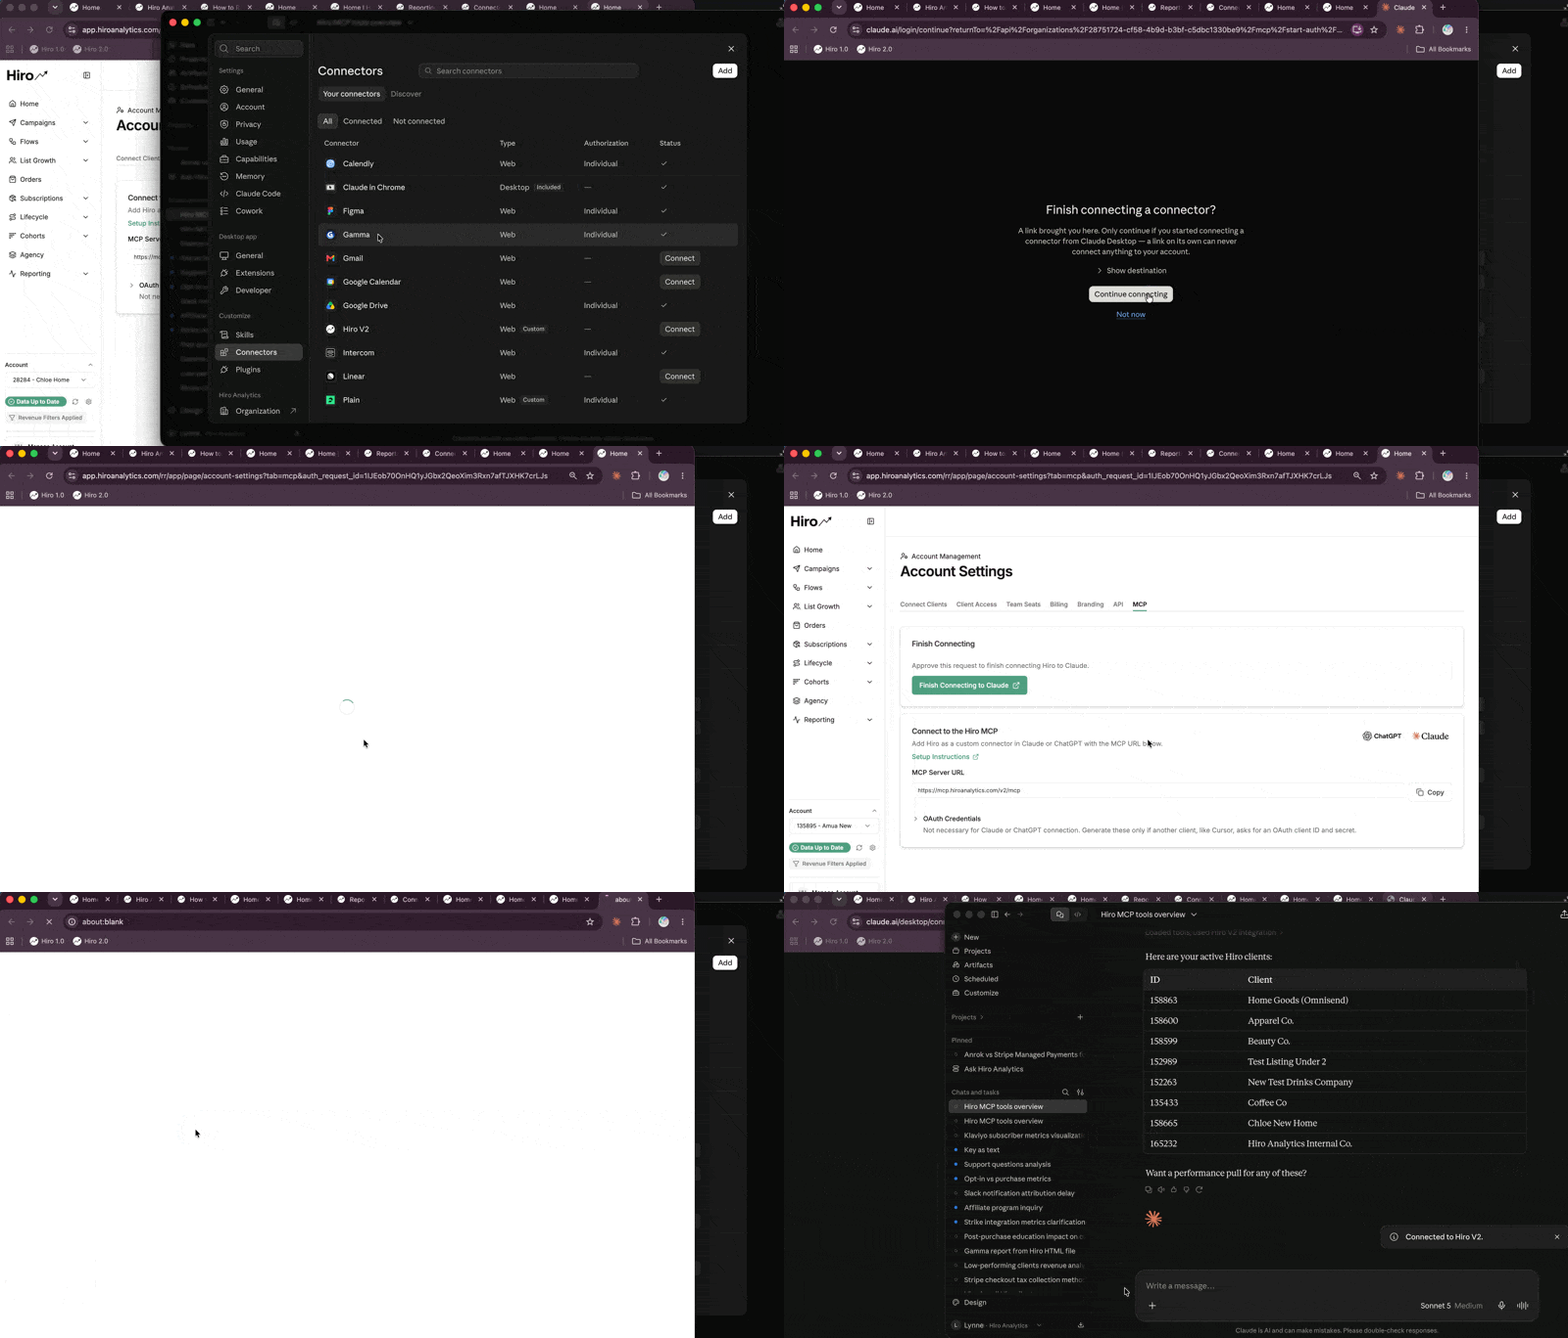
Inside Settings, follow this path: Settings › Customize › Connectors.
Hiro will be on the list as an available connector to connect to if the organization permissions step from above was completed.
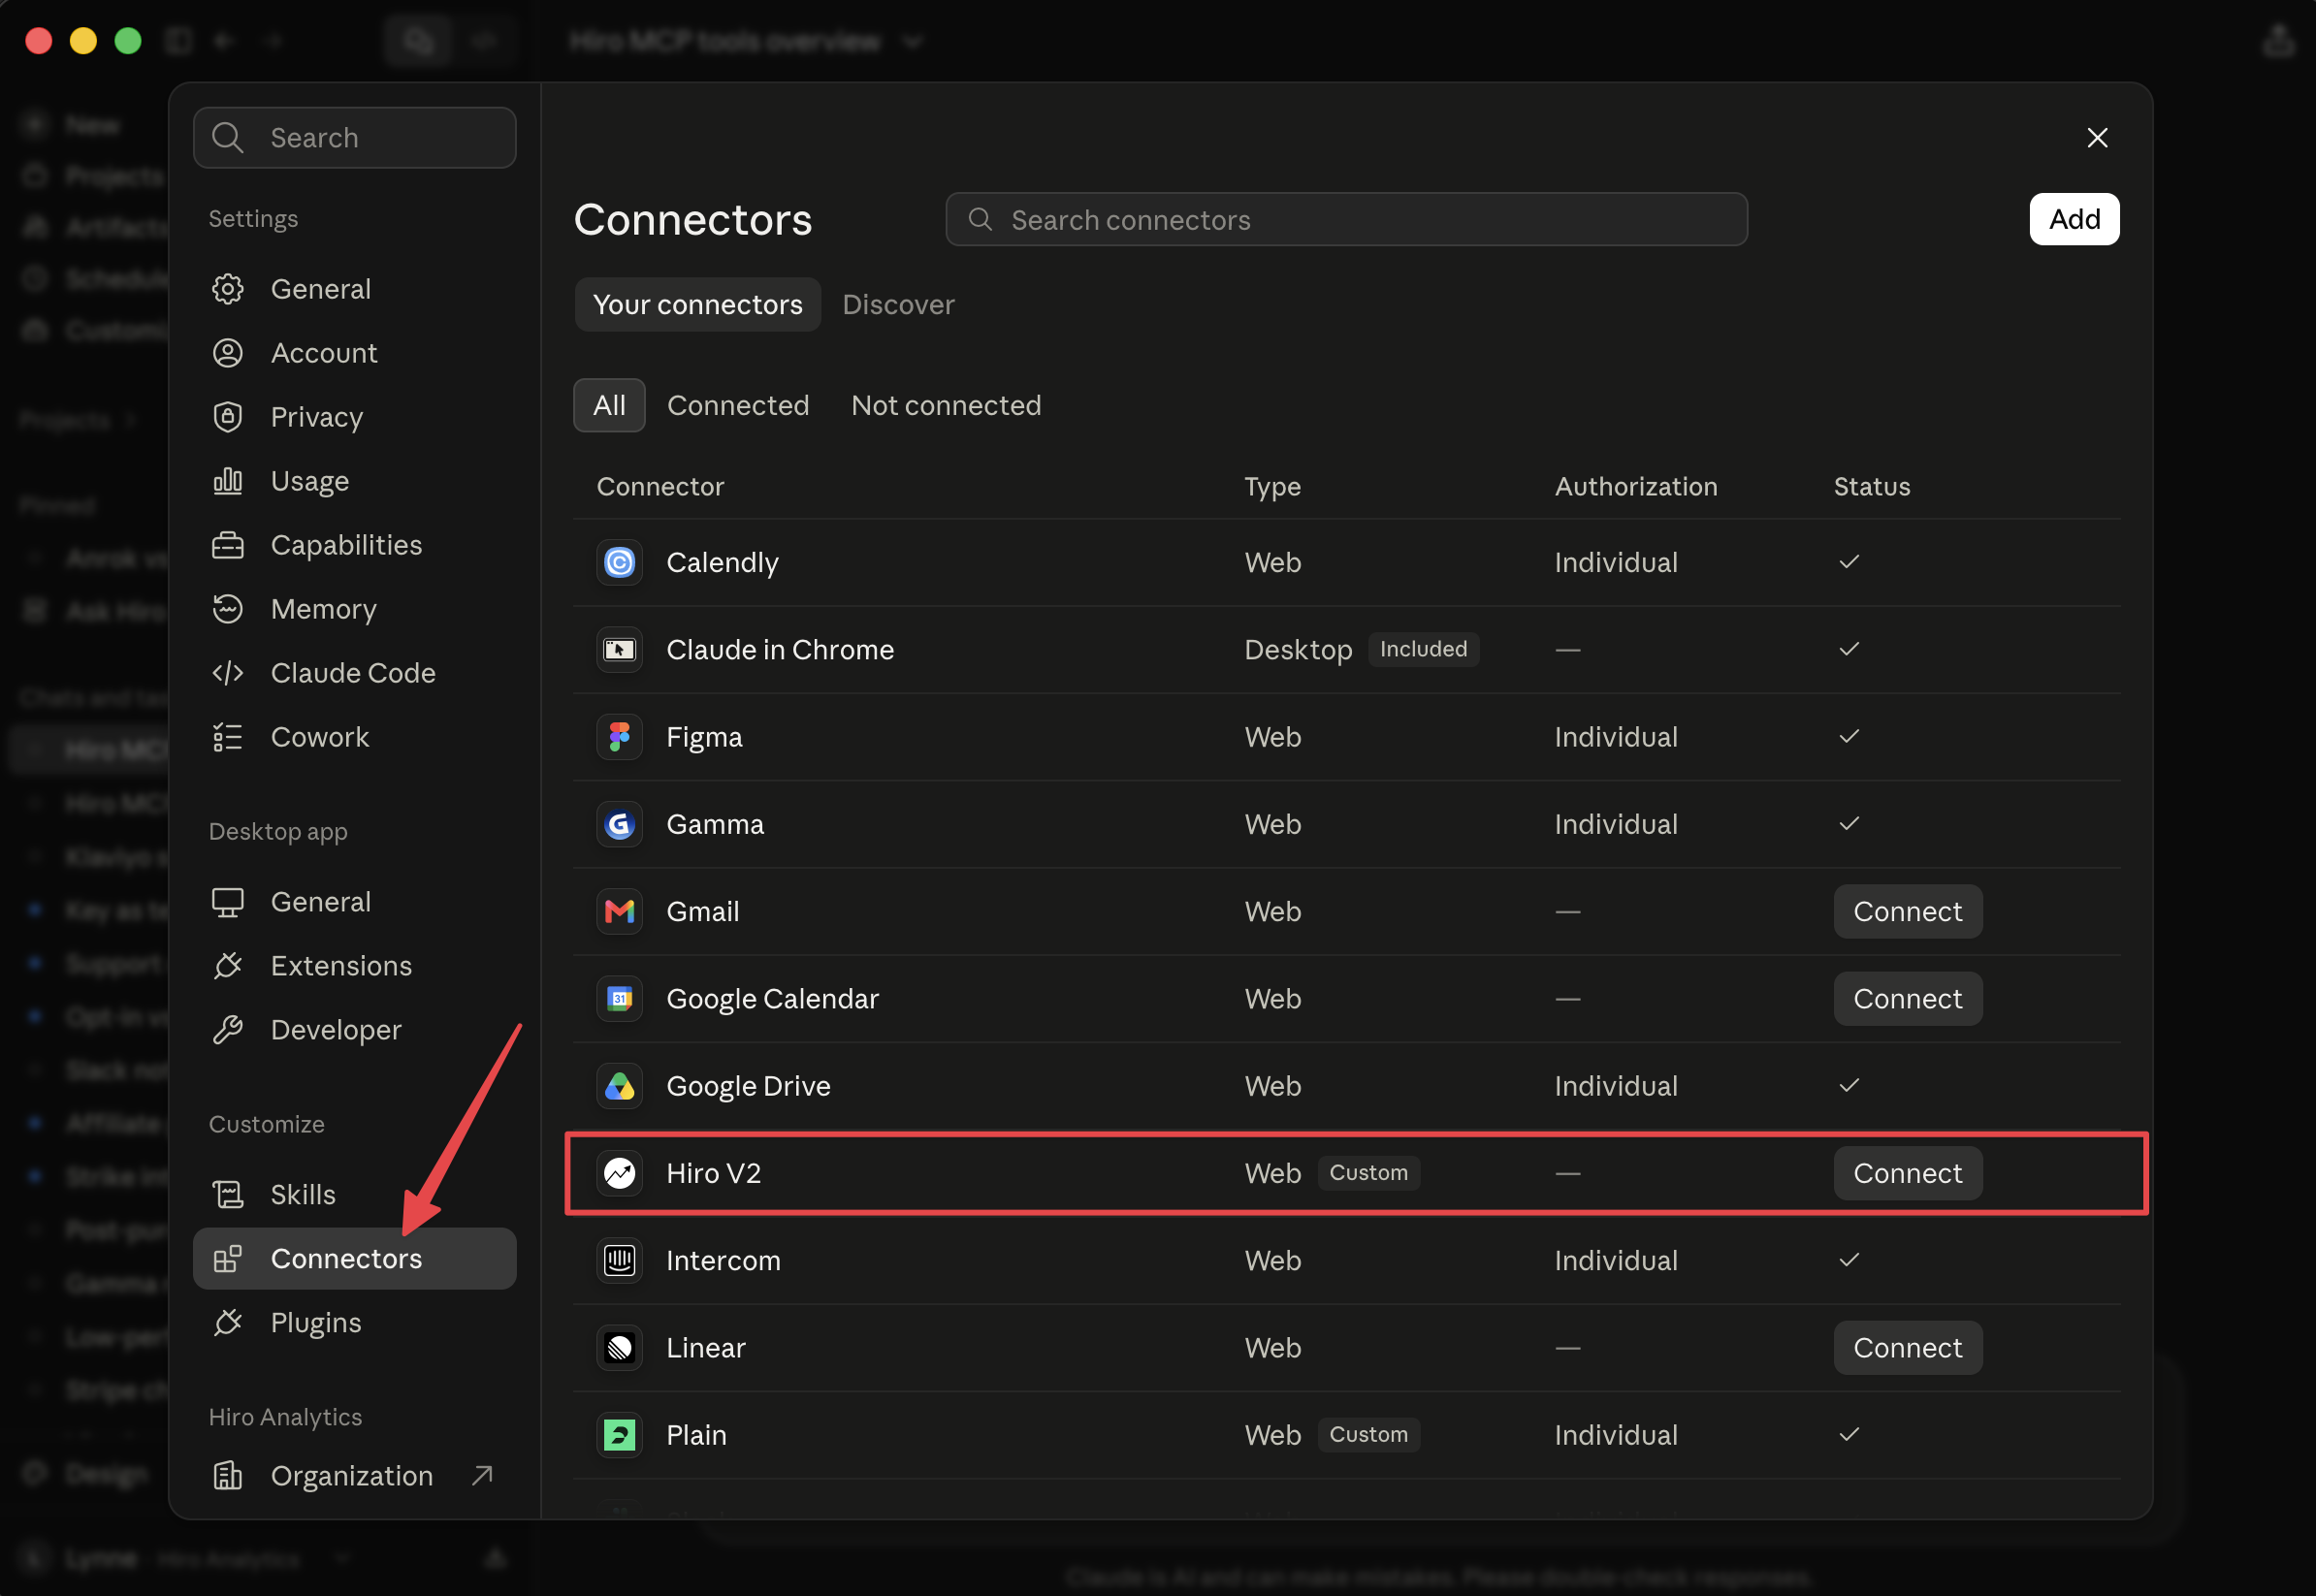
Step 3: Add Hiro as a custom connector
Click the Connect button in Claude. A new window will appear in your browser asking to connect. Select the Continue connecting button. The page will redirect you to the Hiro MCP page where you will select the green Finish Connecting in Claude button.
Once complete, you’ll be redirected back to Claude, where a notification in the bottom-right corner will confirm that you’ve successfully connected to Hiro V2.
Step 4: Verify the connection
To confirm everything is working, start a new Claude conversation and try a prompt like: "List all of my Hiro clients"
If Hiro responds with your client list, the integration is live.
Step 6: Handle permission prompts
Claude may prompt you with Allow dialogs when using Hiro tools for the first time. You can set these to Always Allow to avoid being prompted repeatedly.
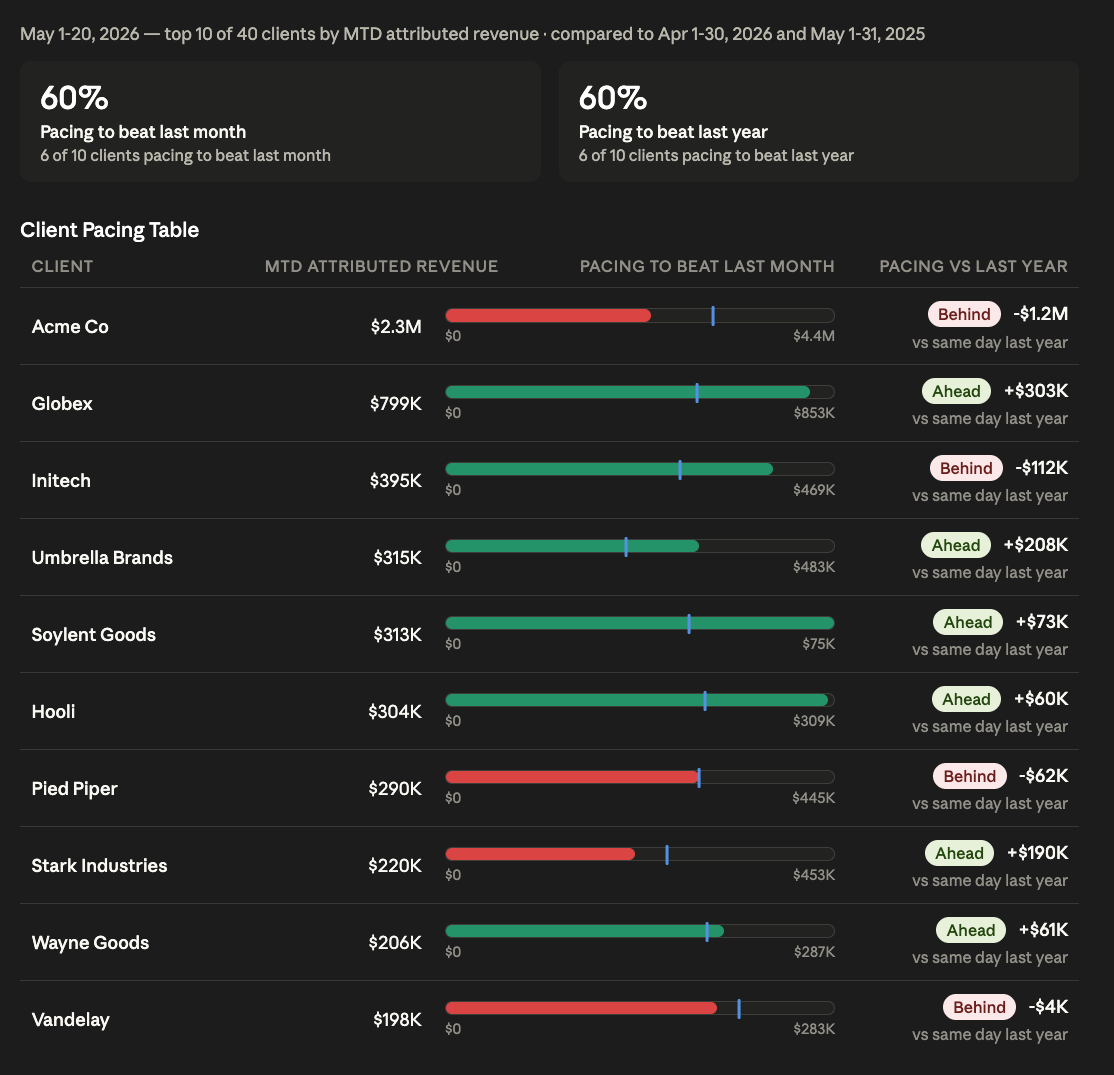
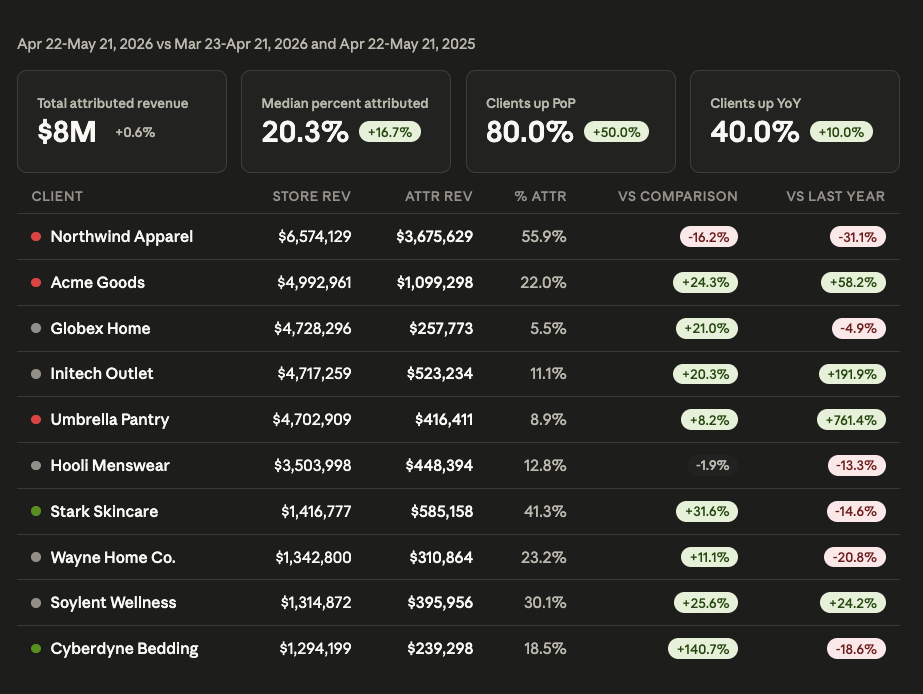
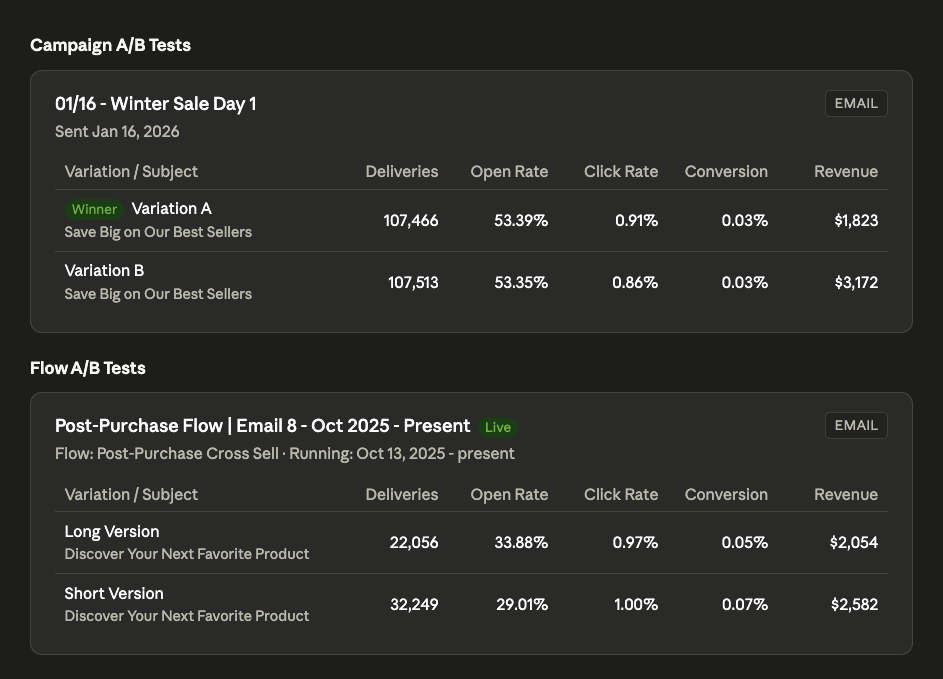
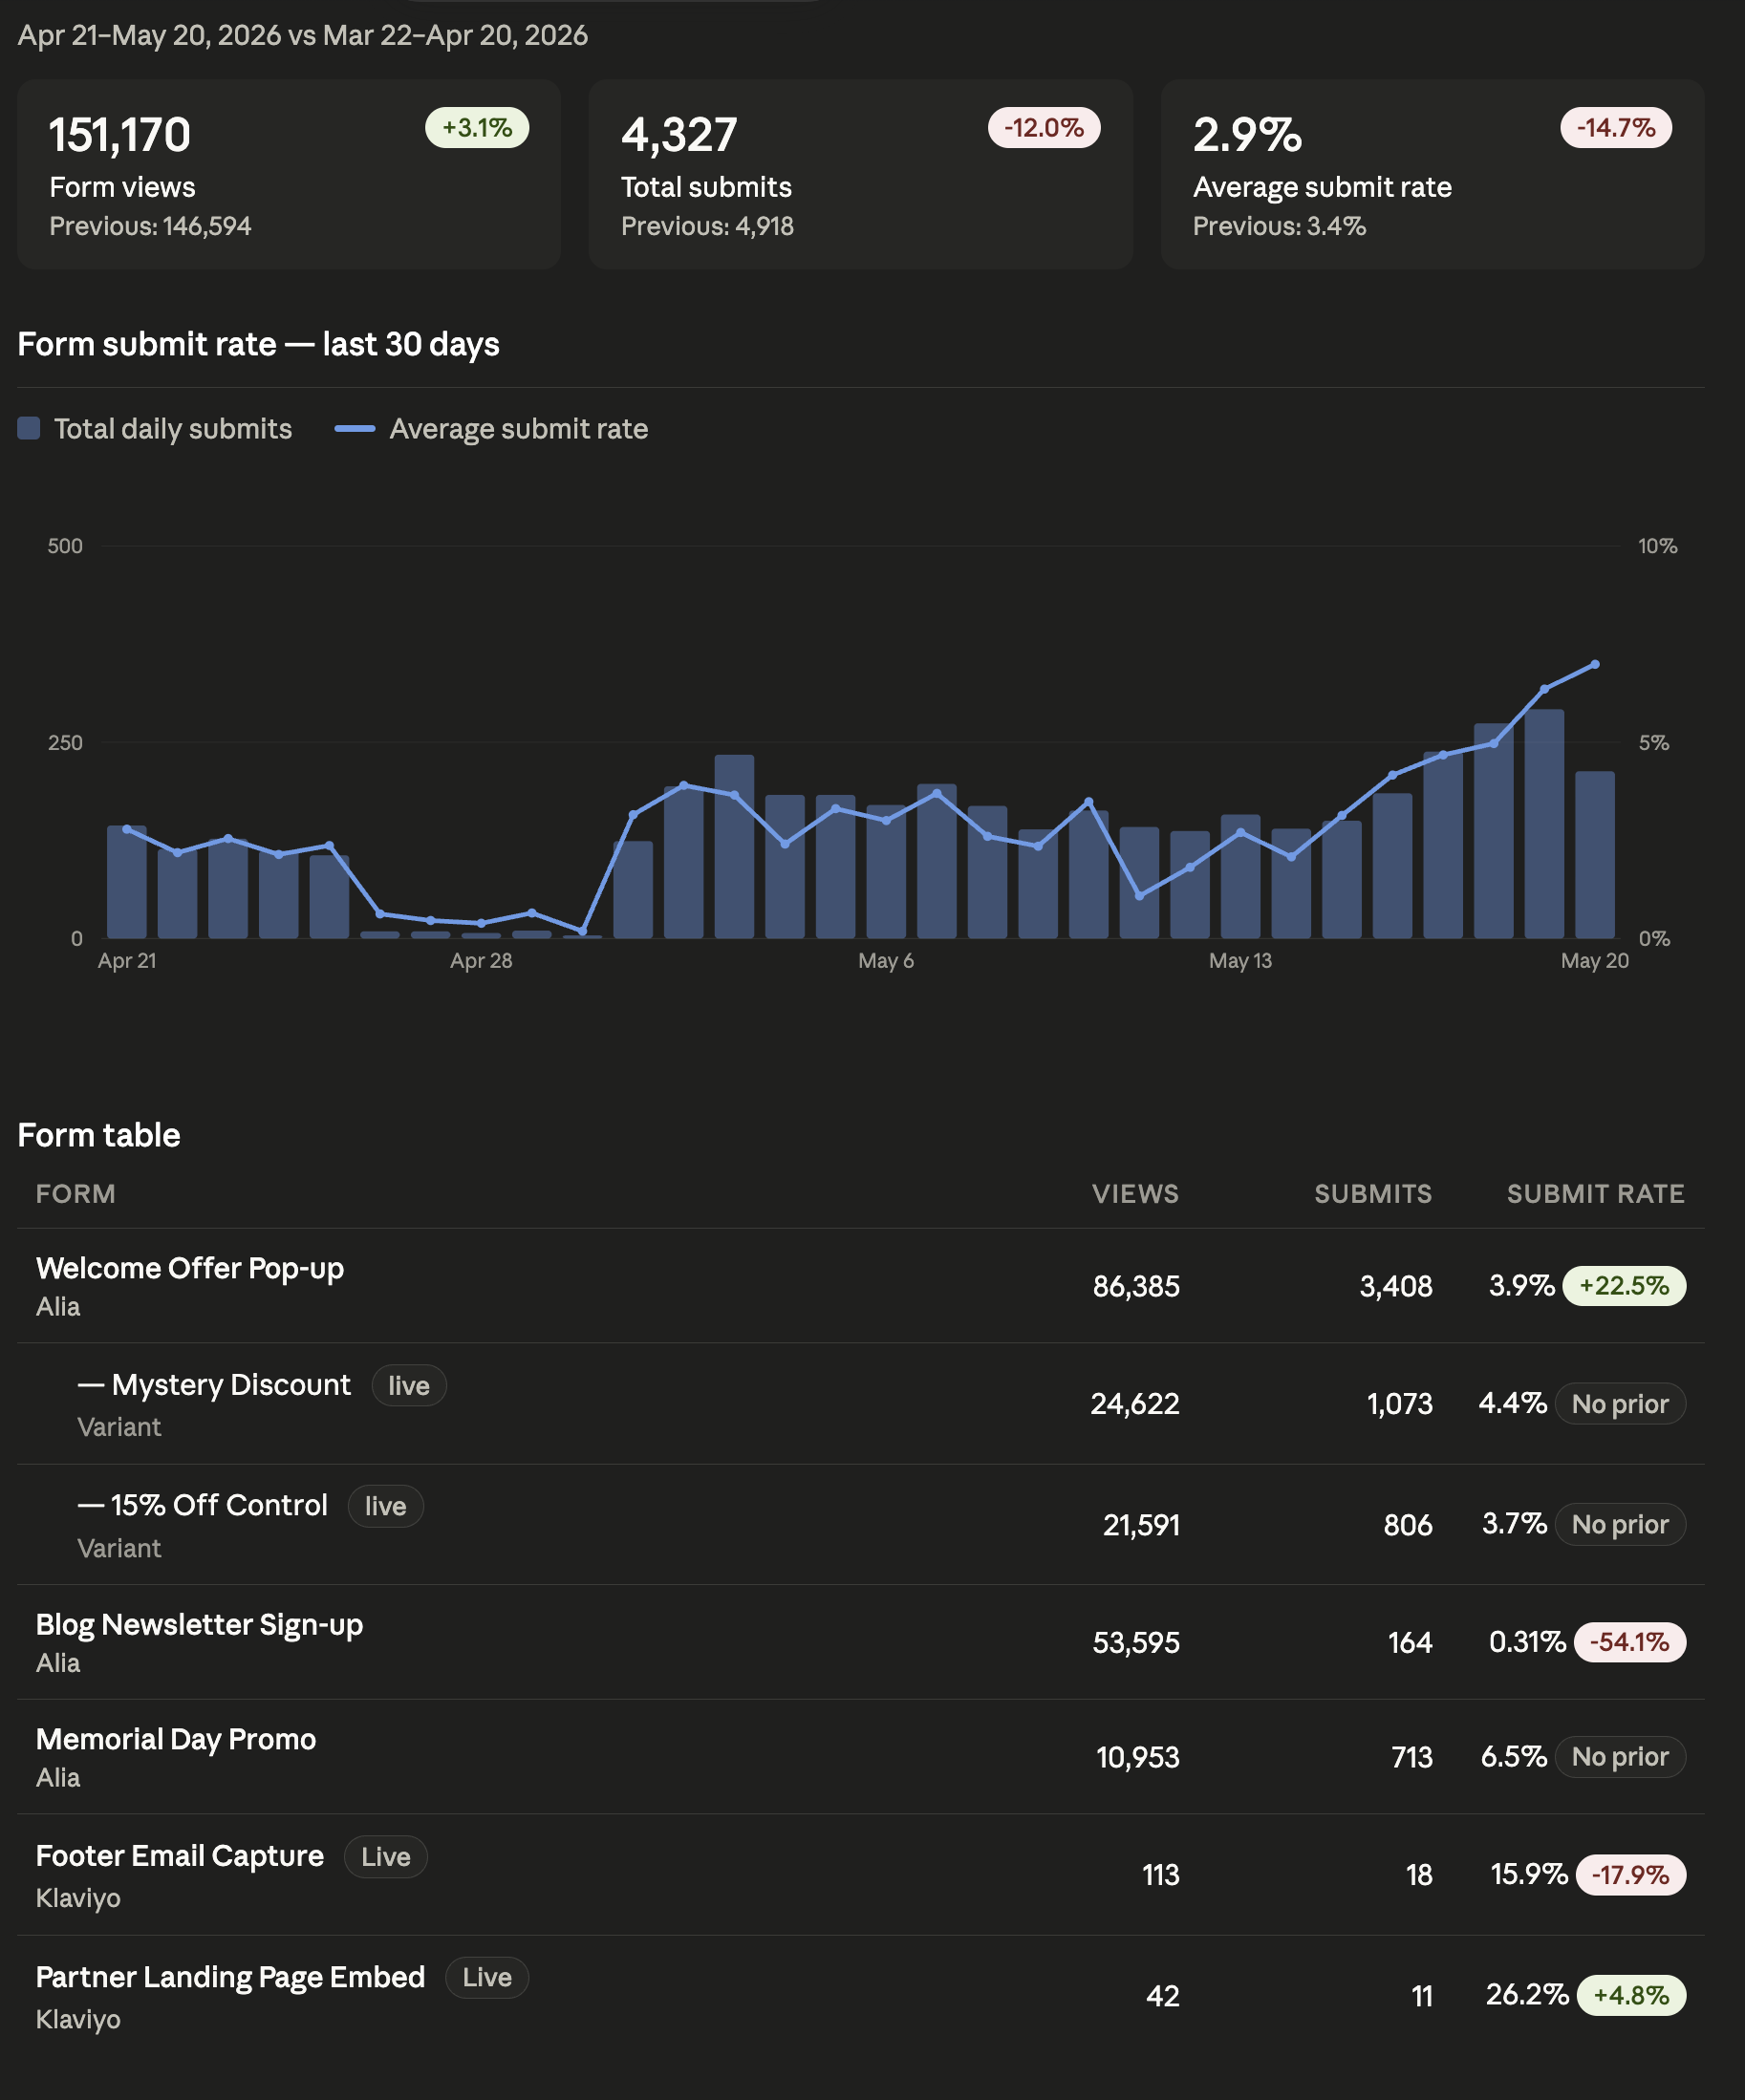
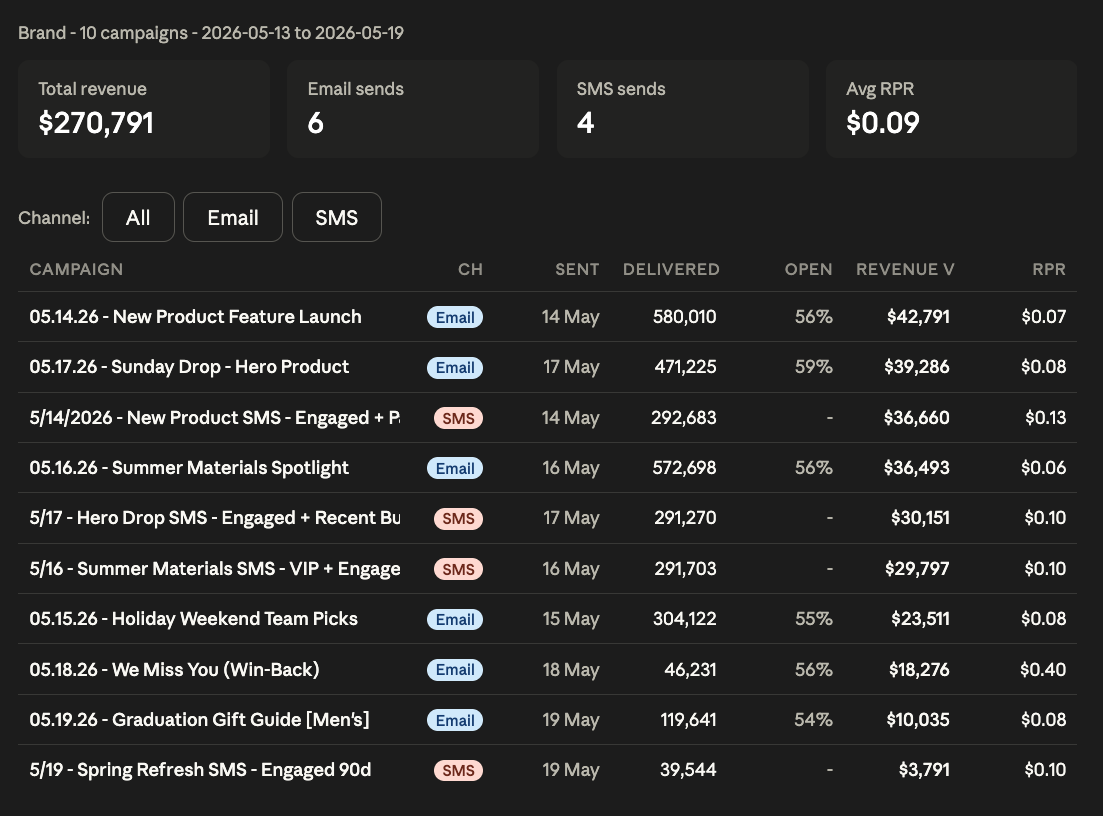
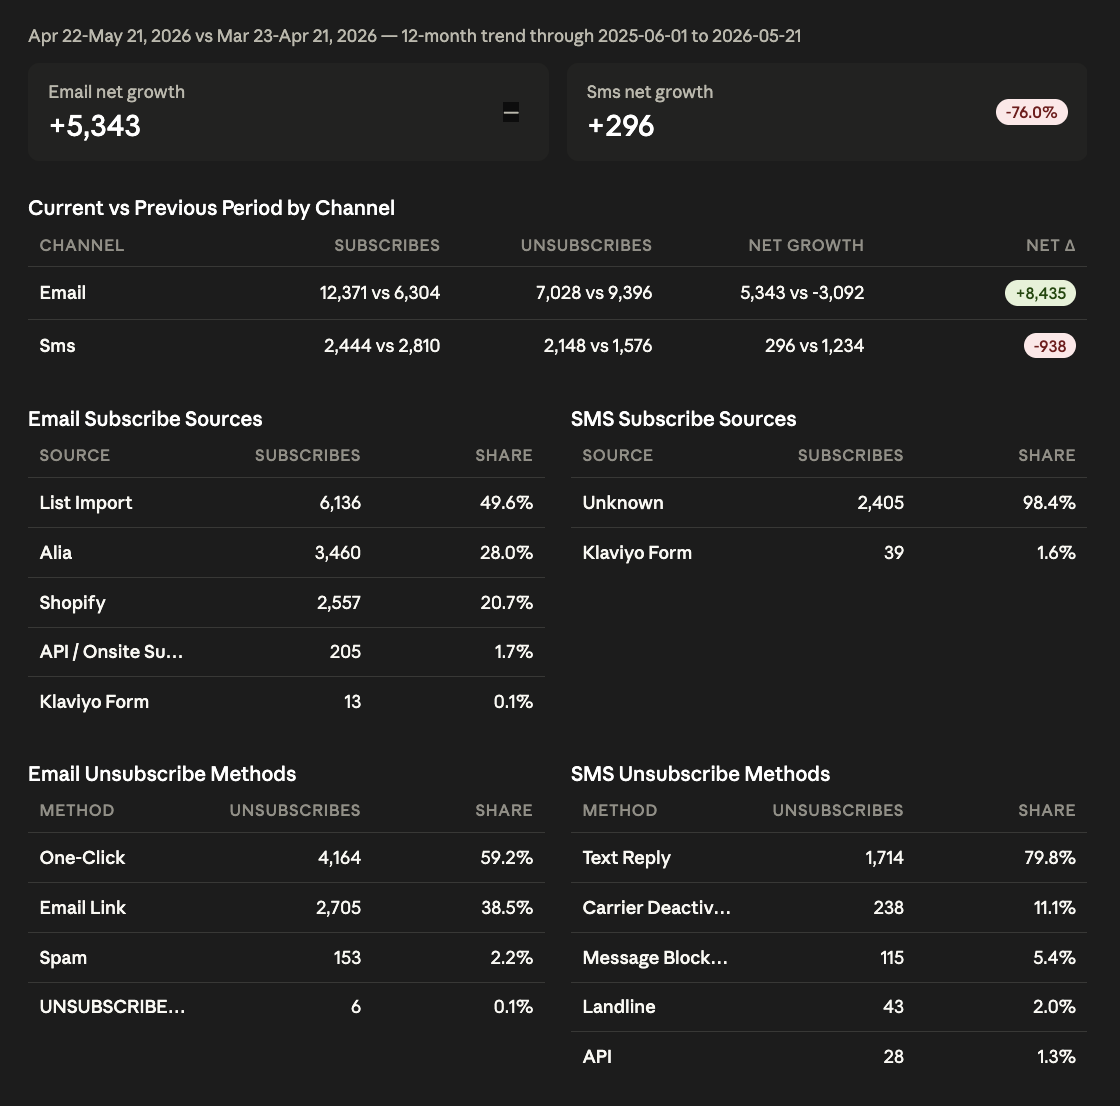
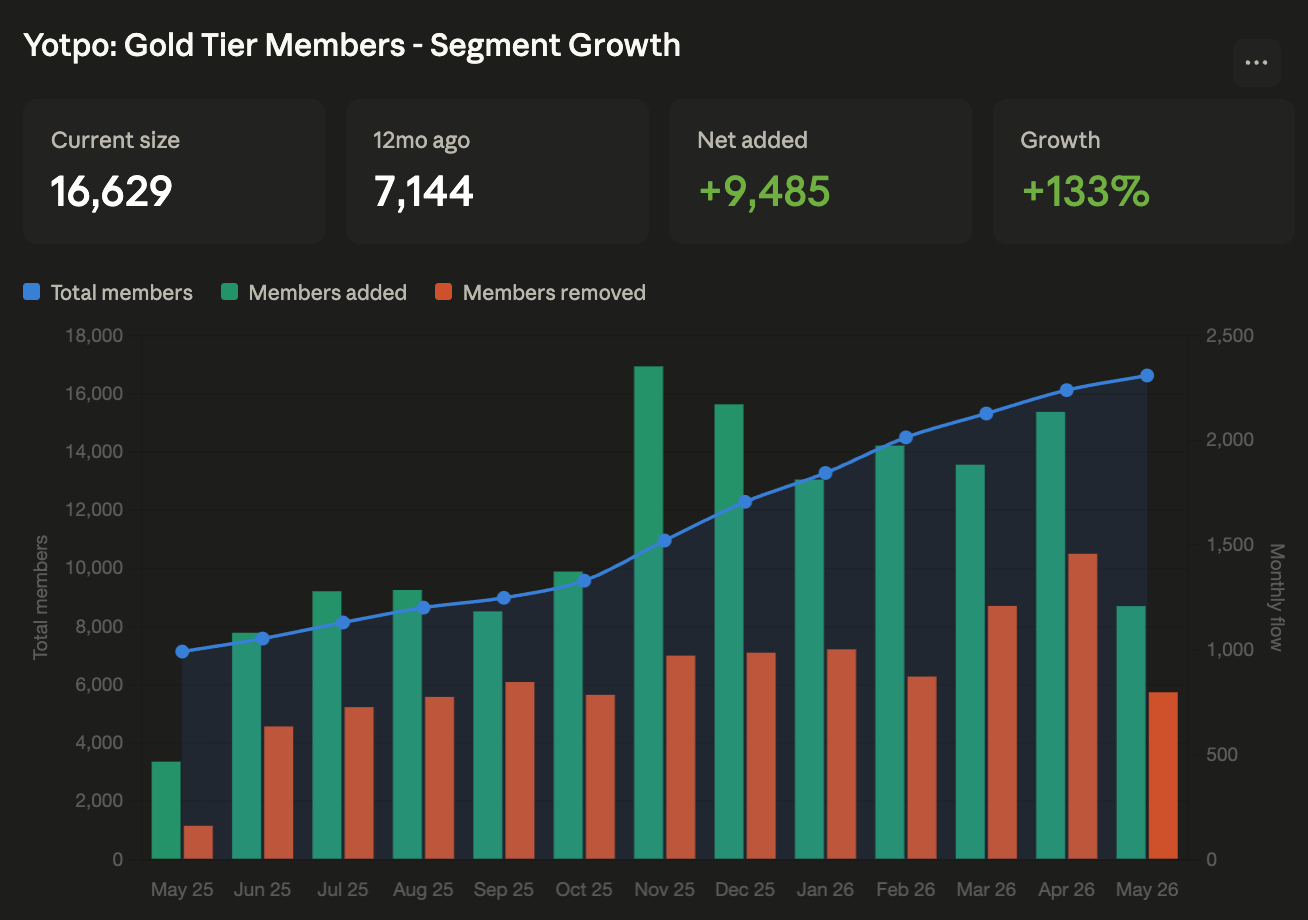
Here are a few examples of Claude using the Hiro tools to gather client data.
Client Pacing
Agency Performance
A/B Tests
Form Performance
Campaign Performance
List Growth
Segment Growth
How to connect Hiro to ChatGPT
Step 1: Get your Hiro MCP Server URL
Have both your Hiro MCP Server URL and ChatGPT open in separate windows.
You can find your Hiro MCP Server URL on the Account Settings page in Hiro.
Important: ChatGPT workspace permissions
Custom MCP apps require Developer Mode in ChatGPT. Depending on your ChatGPT plan and workspace settings, an admin or owner may need to enable this before Hiro can be added.
For ChatGPT Business, Enterprise, and Edu workspaces, admins can manage access to custom MCP apps from the workspace settings.
Step 2: Enable Developer Mode in ChatGPT
In ChatGPT, open Settings → Apps → Advanced Settings and enable Developer Mode.
If you don't see this option, your workspace administrator may need to enable access to custom MCP apps first.
Step 3: Add Hiro as an App
Once Developer Mode is enabled:
Go to Plugins.
Select + Button.
Enter Hiro as the app name.
Paste your Hiro MCP Server URL into the MCP server URL/endpoint field.
Continue through the setup.
When prompted, complete the Hiro authorization flow.
Hiro should now appear under your enabled Apps in ChatGPT.
Step 4: Verify the connection
Start a new ChatGPT conversation and ask:
"List all of my Hiro clients"
Select or mention the Hiro app if ChatGPT does not automatically use it.
If ChatGPT returns your Hiro client list, the connection is live.
When you need ChatGPT to retrieve fresh Hiro data in a follow-up message, select or @mention Hiro again.
ChatGPT may ask you to approve certain Hiro actions depending on your workspace permissions and the action being performed.
Note: Custom MCP functionality and Developer Mode are still evolving in ChatGPT, so the names or location of these settings may change slightly over time.
🚧 The Hiro MCP is currently in beta.
You may occasionally run into unexpected behavior — data may not load as expected, outputs might need a retry, or certain features may behave differently across clients. We're actively improving the experience and your feedback helps. If something doesn't work as expected, try rephrasing your request or breaking it into smaller steps.
For persistent issues, reach out to the Hiro team directly via Slack.